| < PREVIOUS - RENDERING |
Composition - Why to do everything in 3d?
Yes, why? In the time when I was still using the POVRay to render my images, I tend to do everything in 3D. The result from the POVRay was the final image. But as time passed, I learned a lot about how to do stuff faster and better. One of the big time optimisation factors lies in postprocessing programs like Digital Fusion, so if you haven't explored or used some of this programs before, I suggest you do so.
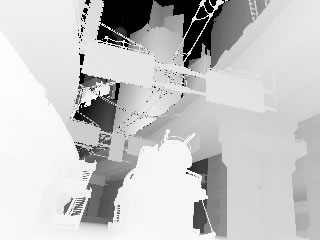
The fog was the main reason why I have rendered depth map channel with the image. With this channel postprocessing program can easiliy extract the depth of the elements in the image and use this to fade them to simulate the fog effect. You can also easily in tweak it or color it in real time, without the need to render the image once more. This makes this process way faster.
The image below shows the Z depth channel of the rendered image.
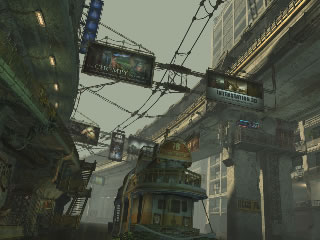
and the exagerated fog extracted from the top image:
But fog wasn't the only thing that I have done in postprocessing. I have also made a few color corrections, and added some grain to give a little noise to the image. This makes the image look more like a print, not so clean, and it makes the final image a little more real.
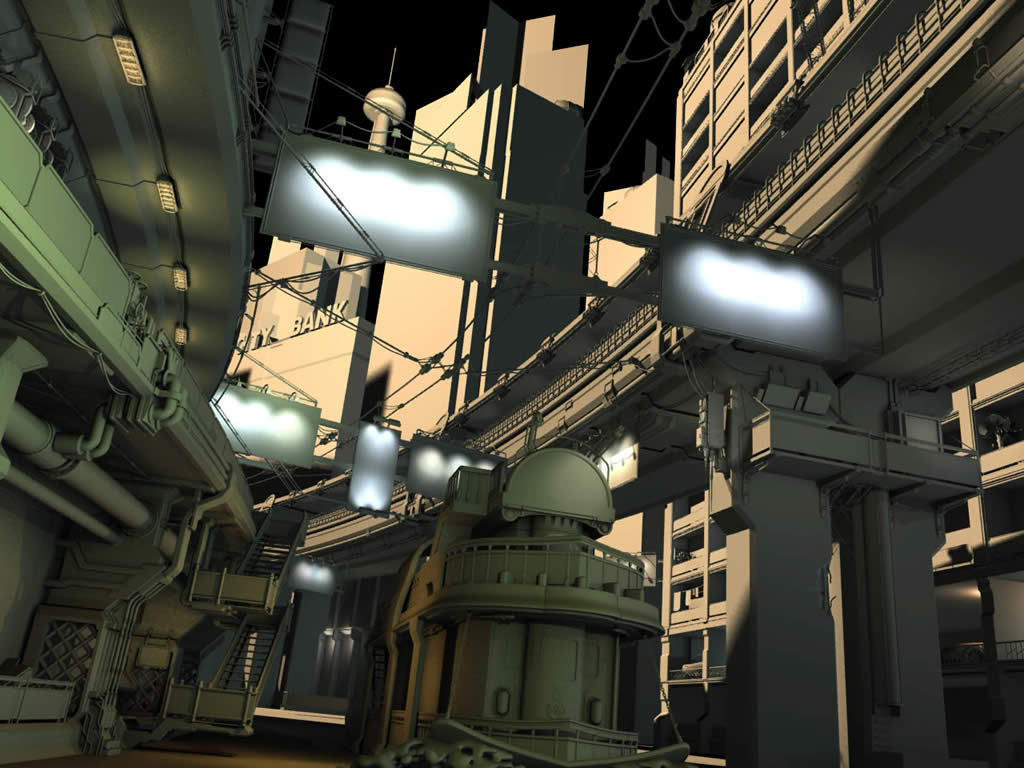
The example of the image corrections that I have made in postprocess can be visible in next two pictures. First, the original, which came out of the renderer:
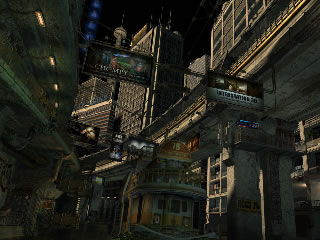
... and the one with the color corrections:
As you can see, the difference is very noticeable. Color corrections that I have used in this image were made on the whole image. But in some cases you would want to make the corrections on the particular objects in the image. The one way to do this is to restrict the area on which color corrector works. This can be done either with the mask painting which is not so precise, or by rendering the mask from the maya.
If you decide to render the mask in maya this is what you need to do. Create two surface shaders. For the first one set the color to black and for the second to white. Apply the first one to every object in the scene and the second one to the object which you want to get mask, and render the image. After the rendering, you will get perfect black and white image which isolates the particular object on which you want to do the color corrections. Now load that image in postprocessing program and use it to restrict the color corrector area.
There is one more thing which you can do in postprocessing and that is to apply the ambient occlusion map to the final render. You already saw the example of the ambient occlusion renderer, and you have learned the way to do it. But let's see it one more time:

To see things a little bit better I will apply the ambient occlusion map to the next render which is the image without the textures:

And with the occ over it:
Now if you compare the picture with and without the ambient occlusion you will easily see the difference. Some details, particulary the ones that are at the edges where surfaces intersect are a little bit darker while the others keep their color values. So how to apply the ambient occlusion image to the original.... just load photoshop and put the ambient occlusion image over the main image layer and change layer blending mode to multiply. What I also did is that I have played with the Curves (Ctrl+M) a little bit to change the intensity of the ambient occlusion image. You can also fade it a little bit if you think that it is pushing details too far into the dark.
That's it. Not too much about the postprocessing, but enough to make life easier. ;)
Well, my 3d friends, that's all for now. Hope that you will come to see my next tutorial-overview when it comes out. ;)
Also be free to email me if you don't understand some parts.
Toni Bratincevic
toni@vizije.hr
www.interstation3d.com
| < PREVIOUS - RENDERING |