| < PREVIOUS - WORK IN PROGRESS |
Lighting
Lighting is one of the crucial elements in every scene. The light tells a story of the picture in the similar way the models or textures do, but I think that it has a much stronger and faster impact on our brains. I already mentioned some stuff about the lighting that I have used in this picture at WIP section but I will repeat it again in this section, and explain it more detailed. I suppose you have already learned about the light types that maya uses since I will not go in details about them.
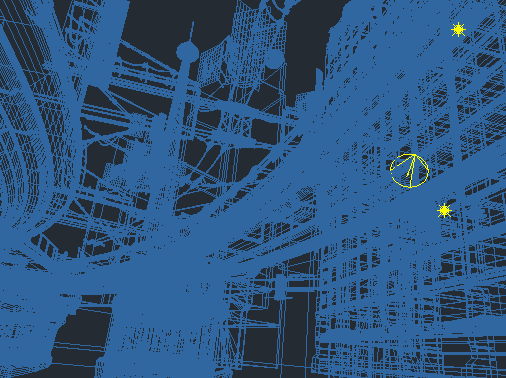
For the first step let's examine the light setup a little bit. Click on picture below to get the full resolution. The light from wireframe view was overlayed over the rendered image just to roughly show the effect of the particular lights.
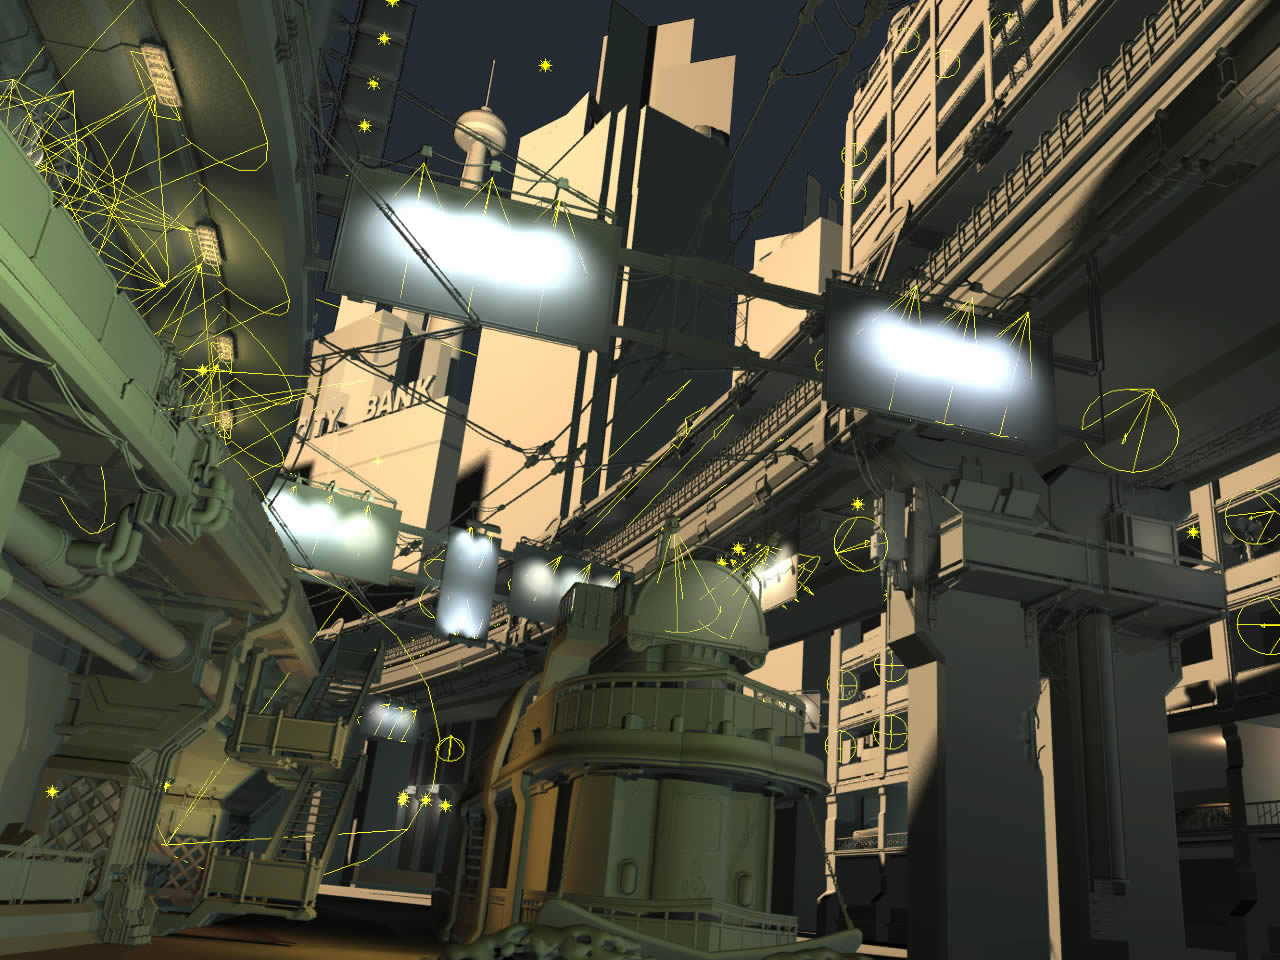
The scene has around 120 light in it. I have used almost all types of light that Maya has. Spotlights and point lights have been used to light up particular areas of the scene. Almost all of them use eather linear, quadratic or cubic fall off. This is because I wanted for them to only affect the part of the scene I wanted to. You will se the effect of the falloffs later in this tutorial. There are also some area lights and few directional lights. The directional lights were used to give a small amount of light to all elements in the scene and area lights were used to lit up the lamp objects on the left.
Many of these lights have raytraced shadows turned on. Yes, they can be a little slow sometimes but MentalRay can take care of them pretty fast because of his fast raytracing engine. So be free to use them in your work, but watch out when you get to animation. ;) The shadows maps are also usefull stuff, way faster, specially when you want the smooth shadow, but they are not so precise as the raytraced and they don't handle transparency very well... but enough of this since I didn't use them in my work here.
Let's just mention where you can find the most used parameters of the lights. First, to create the light you want to go to Create > Lights. There are six types of lights ... and in my image I have used four types of them. The one particular light that I have found to be very interesting, but I didn't use in my picture, is the ambient light so check this a little bit. It can be of great help when trying to fake global illumination.
The options that were particulary interesting to me when creating the lights are:
- Color - one rule for this ... never use the default white light, always give some color to it. This makes models that are lit up more interesting and more alive - real.
- Intensity - tightly connected to the Decay Rate - if the decay is set, for example, to quadratic then intensity should be raised to let's say 100. But that depends on the scale of the scene. Experiment with this. Remember also that the light intensity which you see in the viewport is not the same that will came up from render. I tend to use some type of decay rate for every light in the scene.
- Emit Diffuse and Specular - when faking global illumination in some cases you shold uncheck the specular so that objects do receive the specular.
- Shadow > Raytrace Shadow Attribute - Turn on raytraced shadow for nice shadow effect. In some cases you should play with the Light Radius to get the soft raytraced shadows. If this introduces noise to the shadow, increase the Shadow Rays but do not go to far with this since it affects the render time a lot.
- MentalRay > Area Light - very usefull option for the area light setup. Set type to what you need .... Rectangle, Disc, Sphere, Cylinder or user defined object that you want to be light emiter. Again if the noise occurs then increase the Sampling. The low sampling is the sampling of area light in reflection or refraction, so keep this in mind if you have particular scene with many reflections.
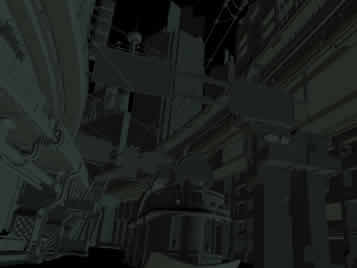
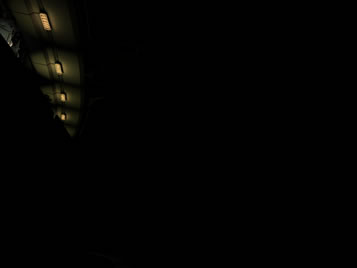
Back to the scene ...one of the first steps, after I did some initial models, was to set up the main light of the scene. You can probably call this the key light since it is the strongest light in the scene. Since I wanted to light up the right part of the scene, part of the highway and the back buildings I have positioned this key light far away from the objects. This was the point light with the light-orange color and 1.5 intensity. I didn't set the falloff in this one since I didn't need it ... I wanted to light up everything that it can reach. There are also the raytraced shadows with Light Radius set to 1 and shadow rays to 10. This produces a little blury shadow which doesn't look so distracting like sharp shadow. These options can be set up in attribute editor of the light, just find raytraced shadow. You will probably ask why not directional light if it is a sun... well it is not the sun. There isn't any visible sun since it is hidden under the dense fog, that's why humans created this big light emiters to light up their cities ... and this is why there is this point light, to simulate that. ;) Just look at the picture below to see the effect of the this light on the image.
But the key light alone wasn't enough to make things the right way. The next step was to make few directional lights to give a little bit of light to all objects in the scene ... to make a little ambient or reflected light, but just a little bit. As I mentioned this time I have used the directional light, two of them. This lights do not cast shadow so I was carefull with intensity setup of them since some stuff may look flat if overdosed.
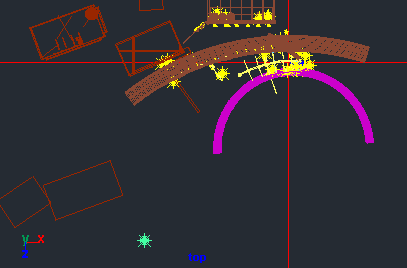
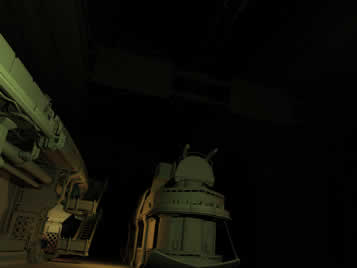
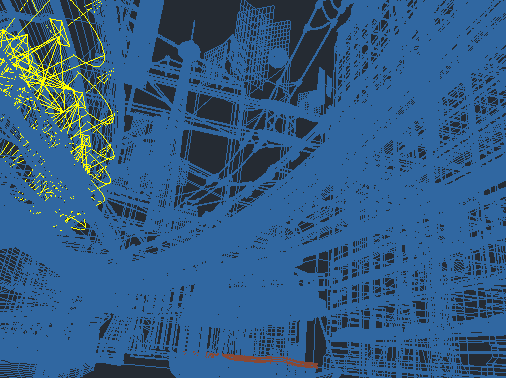
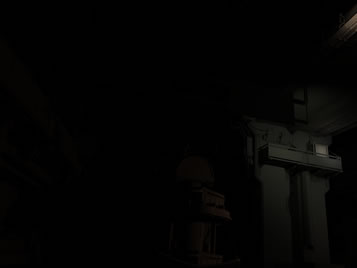
After these few main lights it was time to create some new lights whith which I will light up particular areas of the image. All of these lights, as I mentioned before, use some kind of faloff. To make a faloff just go to the attribute editor of the light that was created and set the Decay to either Linear, Quadratic or Cubic. It depends on how far you want the light to reach. But remember that when you use Linear, Quadratic or Cubic faloff you have to increase the intensity. You should be very carefull when positioning the light and directing them ... go in small steps, be patient. For example in image below I wanted to light up the bottom-left part of the image. For that I have used one point-green light with higher intensity value to light up wide area. Then the smaller point lights were created to light up the space near the stairs. The part of that light also reflects on the transport venichle which can be seen at the picture below.
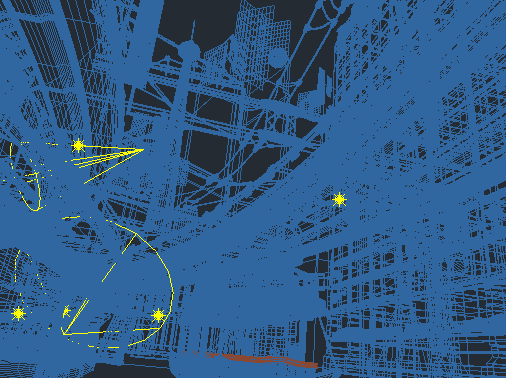
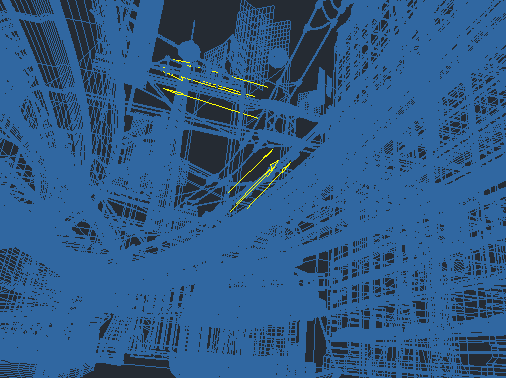
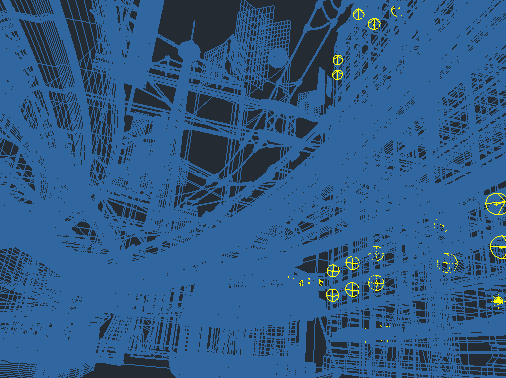
Now left-top area. The spotlights comming from bottom to top were used to light up the particular wider area around the lamps. Then the area lights were also used to light up the smaller area around the lights. There are also the few spotlights pointing from lamps to the direction in which they shine, but I think this can be ignored since the camera doesnt see that part. You can check the effect of these lights on next render:
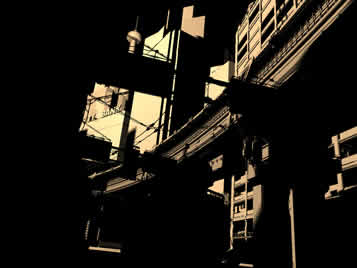
Step by step and I have come to the part of the section below the highway. This was very important part of the image which had to have nice light setup... not too bright and not too dark. The colors are blended between the main light source and green-orange lights on the left side of the scene. Because of this there isn't visible visual cut in the image and the colors are not so saturated:
There are also many lights in the back models of the picture. Like the garage in the building on the right. Also, there are many spotlights pointing at the balconys at the building model ... I have used them to give some reflected light. These are also needed, but less important compared to the lights that light up models closer to camera. Image:

If you check the source scene provided with this tutorial you can check all this that I was talking about. You can also try to make your own setup, experiment a little bit.
I hope you saw in these few examples how I approached the light setup and what kind of lights I preffer to use for particular cases. The main goal of the entire image light setup is that, at the end, you get well balanced visual experience when looking at it. Do not think that I have created this light in few hours ... it was a long process with lots of experiments and failures but at the end, the result I wanted is here.
| < PREVIOUS - WORK IN PROGRESS |